Baby Chicks in the Classroom

IMG_5410

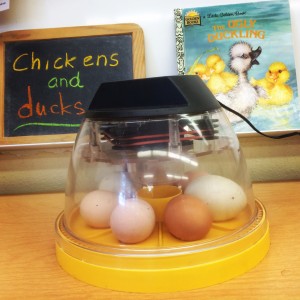
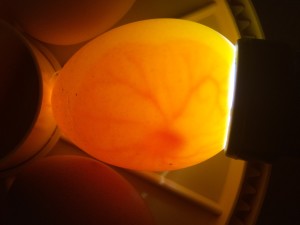
The chicks have hatched! After 22 days in the incubator the big day finally came. We had been worried because the incubator was left open on day 14 as the class went on a field trip to the Zoo. The eggs were left in the cold for more than 6 hours! A quick internet search revealed that chicks can survive several hours without incubation. We candled the eggs but there was not much to see on day 14. Since we had two duck eggs we candled those as well and the little ducks were paddling in their eggs!

img_7131

On day 21 we came in on a Sunday to make sure the chicks were doing fine. Nothing was happening. What in the world could we tell the kids? We sang to the chicks (really) and finally we heard a faint chirping. The next day things started to get going. We first saw a small hole.  The eggs started shaking and rolling. We could also hear them chirping in their eggs pretty loudly, but no chicks yet. It is very tempting to help a chick out of the egg at this point. You can see the beak through the pip. Their struggle seems so real. However helping a chick hatch is usually fatal. It really makes you think about struggle in general. Maybe there is more purpose in it than we realize.

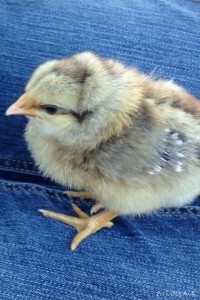
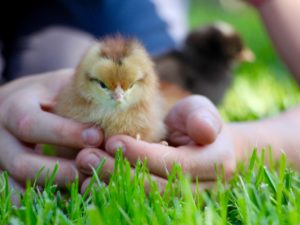
It took an additional 24 hours for all of them to hatch and it took all of our restrained not to intervene and help.  Now they are chirping and running around in their nesting box and our yard. We take them into the school garden and let them peck in the dirt and fluff their feathers in the sun. What a treat for the end of the school year!

If you are interested in incubating your own chicks you can find more information right here.


Classroom Egg Incubation Project Day 1

img_7087
It is time to incubate again! Here are our beauties happily situated in the incubator. This year we have five chicken and 2 duck eggs. We weren’t really counting on ducks. They have a different incubation time than chickens. We will see how it all works out in the end.

We use a fully automated incubator. It turns the eggs and keeps the temperature at a constant 37.5 degrees Celsius.  The kids still turn the eggs by hand once a day. The automated turning is an amazing feature. Without it we would have never attempted this project. Letting the kids hand turn the eggs once a day helps keep them involved. Keep your fingers crossed for some healthy chicks and ducklings!

If you are interested to start your own chicken life cycle project check out our previous post about chickens in the classroom.


Chickens in the Classroom

IMG_1194

Here a chick, there a chick, everywhere a chick chick…

Incubating chickens in the classroom is a great science activity and easier than you might think. A lot of science curriculums include incubating eggs as an optional activity.  Are you ready?

Step 1

Determine who will take the chicks after they hatch.  Since it is impossible to know how many will hatch it is good to find several interested parties and establish a procedure who gets to pick first.

Step 2

Order an incubator, heating lamp, and chick starter from Amazon.

Step 3

Get fertilized eggs.

Step 4

On a Tuesday morning start incubating the eggs.  Make sure to follow the instructions included in the incubator.

Step 5

21 days later enjoy watching your chicks hatch!