STEAM Education Fibonacci Numbers


steam

The most beautiful thing we can experience is the mysterious. It is the source of all true art and science.

~ Albert Einstein

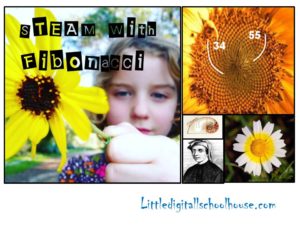
Leonardo Pisano Bogollo, aka Fibonacci rediscovered the number pattern that is now generally referred to as the Fibonacci sequence. Fibonacci recognized that certain numbers seem to occur in nature more frequently than chance would allow. The number sequence is also used to calculate the golden mean or golden ratio, known in mathematics by the Greek letter phi.

You can easily calculate the sequence in your classroom or at home by adding the last two numbers to make the next.

Here is the sequence:

0,1,1,2,3,5,8,13,21,34…

The first two numbers in the sequence are added and the sum creates the next number.

0+1=1. 1+1=2 2+1=3 3+2=5

We usually open our Fibonacci math enrichment unit with posting the number sequence on the board as a challenge. We ask the class to find the pattern. Surprisingly enough even the first graders usually figure it out.

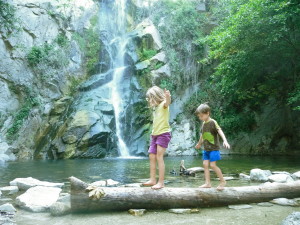
One of our favorite activities is to go on a Fibonacci number hunt walk. We take the kids for a walk and try to find natural items that show numbers in the Fibonacci sequence.

Here are some example from our last walk

Bougainvillea
Bougainvillea

The Bougainvillea shows three bright pink leaves.

This California native has 5 petals.

Daisy_January_2008-1

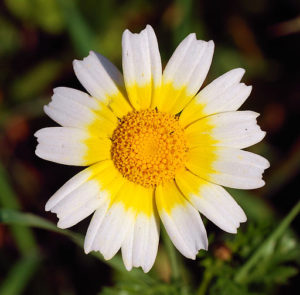
We had to count a lot of petals to find a perfect daisy.

We wrote in our journals and drew some of the flowers after the hike. A great way to introduce kids to the Fibonacci sequence.


Boat Making STEAM Challenge

Boat making is one of our favorite STEAM challenges. Not only do you get to engineer and design a boat, you also get to test it out in water. What could be better, right?

Materials

  • Corks
  • Rubber bands
  • Toothpicks
  • Colored construction paper
  • Small inflatable pool or water table

We show the kids how to wrap the corks with rubber bands. Three work nicely to make a boat. The kids then decorate it with sails made from construction paper and toothpicks. Students are allowed to experiment with the supplies and built a boat however they want. The activity can easily take an hour, depending on how much time you have.

Having fund with STEAM challenges? Here are more ideas:

5 STEAM Tinker Space Ideas

Students often tell us that their favorite part of STEAM education is the tinkering aspect. They enjoy experimenting with new materials and using things in new ways. In the beginning this meant that we took out a giant box of random materials and soon the classroom descended into chaos. The kids loved it but the clean up required was stifling our enthusiasm for such activities. Here are some great ideas for tinker spaces, but remember, a box full of random materials is still a child’s greatest treasure.

1. Materials Wall

img_7533

A place for everything and everything in its place. Peg boards are a great way to organize supplies.  Students can easily see what is available. Labels help to keep things neat.

2. Supply Storage

img_7530

Some of our favorite supplies are popsicle sticks, rubber bands, and tin foil. Kids can get creative with pretty much about anything. If you have absolutely no use for an item, you can be sure students will find a way to create something amazing with it.

3. Display Space

img_7544
A shelf to display tinker creations and curiosities is a great way to set the mood. We like to rotate the artifacts frequently and the kids love the recognition. A big part of STEAM education is the art aspect of it. Artistic touches and displays are a teaching tool in itself.

4. Lego Mindstorms

img_7535

To have a robotics center takes a tinker space to a whole new level. LEGO Mindstorm is one of the easiest to use systems available on the educational market. Students can work in groups, so a few sets can go a long way. This is definitely a “in a perfect world” kind of addition to a tinker space.

6. Research Area

img_7573

Tinker enthusiasts love to read! We like to have a collection of science and engineering books available. The key is not to clutter the area but to present a select collection of books and rotate them throughout the year.

We would love to hear from you.  How does your tinker space look like? What are your experiences with STEAM education?

Bridge Making STEAM Challenge

img_7240

Where science ends, art begins.”

~Charles Nègre

How many bears can cross your bridge? Are you looking to implement  Science, technology, engineering, art, and math, also known as STEAM, in your classroom?  This activity might be just the ticket. You probably already have all the supplies necessary.

Our counting bears were stranded on islands separated by a deep ocean trench populated by kraken, sharks, and mermaids.  They needed help to connect their islands and make peace with their ocean neighbors.  The bears could only find popsicle sticks, clothespins, masking tape, and string.  Would they be able to bridge the islands without falling into the dangerous waters? Would their bridge be functional as well as beautiful? The mysterious creatures of the deep agreed to let the bears safely cross the bridges if they showed innovative and aesthetically pleasing design.  Would the bears be able to make peace and connect their islands?

img_7239
We divided the class in small groups of about five students and they went to work. The kids came up with many different bridge designs and safety features for bears.  Some bears were wearing safety harnesses in case they fell. They considered how the sea creatures would feel about the bridges and what designs would be most appreciated.

img_7235

We are glad to report that all bridges held and the bears are now able to visit each other without danger! The bears and the magical creatures of the deep have learned to live in harmony and peace. Team STEAM has come to the rescue again!

Baby Chicks in the Classroom

IMG_5410

The chicks have hatched! After 22 days in the incubator the big day finally came. We had been worried because the incubator was left open on day 14 as the class went on a field trip to the Zoo. The eggs were left in the cold for more than 6 hours! A quick internet search revealed that chicks can survive several hours without incubation. We candled the eggs but there was not much to see on day 14. Since we had two duck eggs we candled those as well and the little ducks were paddling in their eggs!

img_7131

On day 21 we came in on a Sunday to make sure the chicks were doing fine. Nothing was happening. What in the world could we tell the kids? We sang to the chicks (really) and finally we heard a faint chirping. The next day things started to get going. We first saw a small hole.  The eggs started shaking and rolling. We could also hear them chirping in their eggs pretty loudly, but no chicks yet. It is very tempting to help a chick out of the egg at this point. You can see the beak through the pip. Their struggle seems so real. However helping a chick hatch is usually fatal. It really makes you think about struggle in general. Maybe there is more purpose in it than we realize.

It took an additional 24 hours for all of them to hatch and it took all of our restrained not to intervene and help.  Now they are chirping and running around in their nesting box and our yard. We take them into the school garden and let them peck in the dirt and fluff their feathers in the sun. What a treat for the end of the school year!

If you are interested in incubating your own chicks you can find more information right here.


Play With Nature

Play With Nature

How much time do your students spend interacting with nature?  Think about it.  What once was an everyday occurrence for kids is now rare and sometimes even non-existent.  Students used to walk to school, climb trees and even got dirty.  Today children only spend about 1% of their time outdoors. They are usually corralled behind a chain link fence on a  concrete surface.  We allow them to have a jungle gym and a ball but they are completely removed from nature…

Why does nature matter?  Nature allows children to play and interact with the physical laws of the world.  To play with a pillbug means to explore the world of crustaceans.  To observe water and sand is to get experience with erosion and how substance change when they are mixed. Sticks are great for building (and sword fights).  When we give children toys, their function and purpose has been predetermined.  Nature provides an open-ended game, wakes curiosity, and has a generally calming effect on the mind and body.

When children are allowed to experience nature it is often within the context of a park or other area altered by man.  We tell them, ” Don’t touch this, don’t pick the flowers, please don’t pick up the rocks.”  We get upset when they want to interact with their environment in a tactile way.  Children’s brains are still developing and so the elementary grade student has to touch her environment, just as much as a baby has to mouth objects, in order to establish the brain mapping of our three-dimensional world. It is a child’s job to make mud pies, throw rocks, and play with sand and water.

P1030805

Research has shown that playing with nature is an important contributor of healthy development in children.  The benefits of reconnecting with nature seem endless:

  • Increased concentration
  • Better performance on standardized tests
  • Reduction of ADD and ADHD symptoms
  • greater academic success
  • greater impulse control
  • stronger immune response

What can be done right now in our classrooms and homes to give children experiences with nature that are so vital to their well-being? One way to bring nature into your classroom is to create a nature center.  It could include shells, pinecones, sticks, pebbles , and other interesting things.  Allow children to build with the natures center. They will build little worlds of their own right in your classroom.  The center can be used for many academic activities but sometimes it helps to just use it as an area of play.  Even in our world of high pressure academics, our children sometimes need to be able to do what they were meant to do-play.


Chickens in the Classroom

IMG_1194

Here a chick, there a chick, everywhere a chick chick…

Incubating chickens in the classroom is a great science activity and easier than you might think. A lot of science curriculums include incubating eggs as an optional activity.  Are you ready?

Step 1

Determine who will take the chicks after they hatch.  Since it is impossible to know how many will hatch it is good to find several interested parties and establish a procedure who gets to pick first.

Step 2

Order an incubator, heating lamp, and chick starter from Amazon.

Step 3

Get fertilized eggs.

Step 4

On a Tuesday morning start incubating the eggs.  Make sure to follow the instructions included in the incubator.

Step 5

21 days later enjoy watching your chicks hatch!