Making Pinch Pots

img_1045

We shape clay into a pot, but it is the emptiness inside that holds whatever we want.”

Tao Saying

Working with clay is something really special. Our school has a kiln, and we use real clay. The smell alone is a deeply sensory experience. There is nothing like breaking open a new package of clay.


If you don’t have a kiln to fire real clay at your school you can use modeling clay as well. It still will be a great learning experience for your kids.

We also like to discuss where clay comes from. There are lots of youtube videos of people extracting clay right from the ground.


Clay has to be used quickly. Our clay comes in large blocks. We cut the clay with a string and students work right on their desks. Every student has a small cup of water ready in case their clay gets too dry.

Clay has to be used quickly. Our clay comes in large blocks. We cut the clay with a string and students work right on their desks. Every student has a small cup of water ready in case their clay gets too dry.

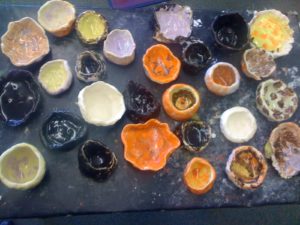
We demonstrate how to knead clay and form a sphere. The trick is to “pinch” your thumbs into the clay to form a small pot. Students smooth the edges of the pots, by moistening their fingers with a little bit of water. Most students have used playdough before, but clay is a very different material. It is hard to knead and has to be moist at all times.

After the lesson, we stash the pinch pots on top of a closet and forget about them for a long time. It is very important that they dry sufficiently or the clay will explode in the kiln. The thicker the objects, the more time they need to dry. We usually wait four weeks before firing them.

The first round of firing in the kiln, also known as the bisque firing, comes first.  Every kiln is different and it is best to read the manual to determine individual firing times. If you are using modeling clay you get to skip the firing process.

Last but not least, we glaze our pots. We use non-toxic lead-free paint and the colors are barely visible during the painting process. We tell the kids the paint works like magic and turns into glass during the second firing process. Firing the glaze is very time consuming because the objects cannot be stacked or touch each other at all.

Finally, the pots are ready to go home. We usually wrap them in clear cellophane so the kids won’t break them. They look very cute filled with candies and make excellent Holiday gifts!

Are you interested in more art projects? Click right here for more (Almost) No Prep Art.

Swamp Goblin and Fairy House Math Game

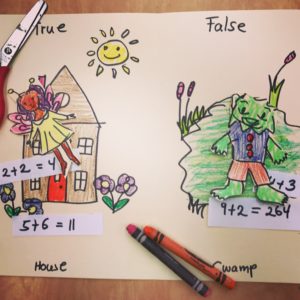
img_8347

We love to make our own math games, and nothing brings equations home like a game of Swamp Goblin/Fairy House.

The game is very easy to make, and kids get really creative with it. Last time we had pop-up swamp goblins, and fairy houses with working doors and windows.

Materials:

  • Paper
  • Markers
  • Crayons
  • Scissors

Procedure:

We introduce the concept of true and false equations with a directed lesson. This game aligns very well to the two math programs we are using. The sample in the picture was made as a preteach activity for Eureka Module 1 lesson 17, and as an extension with MyMath lesson Grade 1 Lesson 14.

We show the kids how to fold the paper and go over true and false equations. Each kid prepares their own came and equations. They exchange them and feed the equations to either the fairies or swamp goblins. We send the games home at the end of the day, and the kids love showing it to their families.

Domain: Operations and Algebraic Thinking

Major Cluster: Work with addition and subtraction equations.

1.OA.7 Understand the meaning of the equal sign and determine if equations involving addition and subtraction are true or false.

Thanks for stopping by. Check out some of our other math lessons right here.

Torn Paper Collage Monsters

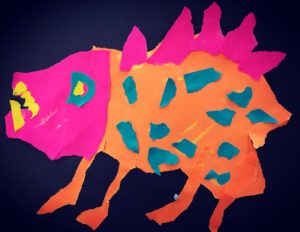
img_8410

“Let the wild rumpus start!”
~ Maurice Sendak, Where the Wild Things Are

Torn paper collages are a perennial favorite in our classrooms. We create them as a literature connection activity, after reading Where The Wild Things Are.

Materials:

  • Colorful construction paper
  • Glue

Procedure:

First, we read Where The Wild Things are by Maurice Sendak. It is really fun to act out parts of the book, by making a “wild rumpus” in the classroom. We pretend there is a large bonfire in our class, and we are all wild monsters. The kids use their imagination and visualize what kind of creature they are. What color is their fur? Do they have claws, warts, and tails? The kids pair-share with a partner and describe how their monsters look like.

Next, we demonstrate how to tear paper. The kids often get frustrated with tearing  paper and want to use scissors. However, it is crucial to tear the paper and embrace the unpredictability of the outcome. Manipulating paper is a great way to practice fine motor skills. Once the kids get the hang of it, they absolutely love tearing the paper.

We also show them that combining seemingly random shapes can create really interesting pictures. The imperfection is part of the appeal. Once introduced, the technique can be used to make all kinds of amazing artwork. We spruce up book covers, holiday cards, and bookmarks.

Let the wild rumpus start!

If you are interested in more art lessons you can click right here.

Haunted Math House

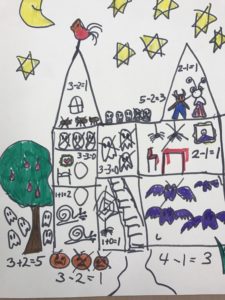
img_8364

Our haunted math houses are a big hit every year. They give students a creative outlet to explore and deepen their mathematical reasoning. The best part is that there is virtually no prep needed for this awesome project.

Materials:

  • Paper
  • Black marker
  • Crayons

Procedure:

We review math stories and then demonstrate how to draw a house with the rooms exposed. The class helps generates ideas for math stories in the haunted math house. Favorites have been ghosts, spiders, and jack-o-lanterns. Sometimes we even act them out.

The materials are then distributed, and the kids get to work. It is amazing to see what they come up with. Some kids make flaps and trapdoors, to make their stories more interesting, others have pop-out ghosts and ghouls.

Once we have introduced this activity we offer it as a choice during math centers.

You can find more hands-on math activities by clicking right here.


Leaf Rubbing

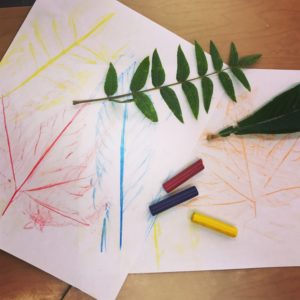
img_8327

Autumn

The morns are meeker than they were,

The nuts are getting brown;

The berry’s cheek is plumper,

The rose is out of town.


The maple wears a gayer scarf,

The field a scarlet gown.

Lest I should be old-fashioned,

I’ll put a trinket on.

~Emily Dickinson

Leaf Rubbing

Leaf rubbing is a great activity any time of the year. It definitely is a favorite in the fall when leaves change colors. Simply rub a crayon over a leave placed under a piece of copy paper; like magic, The leave appears in front of your eyes.

Materials:

  • Paper
  • Crayons
  • Leaves

Leaf Hunt

We start this activity by going on a leaf hunt in our yard. The best leaves come from our sycamore trees. They have the distinct maple leave shape and are excellent for rubbing.

It is very helpful to have a collection of leaves already prepared. This way every student will have great leaves, even if they don’t find any on the walk. We even press and laminate really nice leaves in order to use them over and over. Pressed leaves also make for great fall decoration.

This activity is a great extension to exploring Fibonacci numbers in nature. You can read more about using the Fibonacci sequence to deepen number sense right here.

Art & Poetry

The rubbings also lend themselves to visualize your favorite fall poems. One of our favorites is  Autumn by Emily Dickinson. We charted the poem and the class reads it chorally during our Morning Meeting. Students later copy the poem for penmanship practice; a great fall keepsake that is greatly appreciated by our families.


Sugar Skull Art Project

img_8281-1

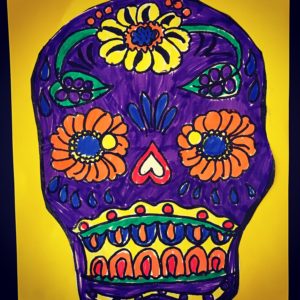
This is a super simple art activity that comes out amazing every time. You can either use the sugar skulls and simply color them, or have your students come up with their own version. We usually do both. First, we have the kids color, and then they create their own sugar skull drawings. We loved to use markers, but oil pastels or crayons look great as well.

Materials

  • Sugar skull printouts
  • Colored markers or crayons
  • Colorful construction paper

We introduce our students to the Day of the Dead, and then show them examples of the whimsical and colorful skulls that brighten this Holiday. We give each student a copy of our sugar skull and bright construction paper. They simply color the patterns, cut out the skull, and glue it on colorful construction paper.

We have more great art projects on our (Almost) No Prep Art Projects page.

STEAM Education Fibonacci Numbers


steam

The most beautiful thing we can experience is the mysterious. It is the source of all true art and science.

~ Albert Einstein

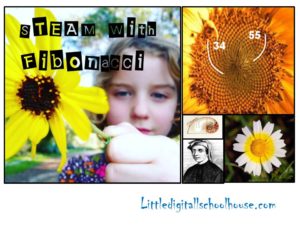
Leonardo Pisano Bogollo, aka Fibonacci rediscovered the number pattern that is now generally referred to as the Fibonacci sequence. Fibonacci recognized that certain numbers seem to occur in nature more frequently than chance would allow. The number sequence is also used to calculate the golden mean or golden ratio, known in mathematics by the Greek letter phi.

You can easily calculate the sequence in your classroom or at home by adding the last two numbers to make the next.

Here is the sequence:

0,1,1,2,3,5,8,13,21,34…

The first two numbers in the sequence are added and the sum creates the next number.

0+1=1. 1+1=2 2+1=3 3+2=5

We usually open our Fibonacci math enrichment unit with posting the number sequence on the board as a challenge. We ask the class to find the pattern. Surprisingly enough even the first graders usually figure it out.

One of our favorite activities is to go on a Fibonacci number hunt walk. We take the kids for a walk and try to find natural items that show numbers in the Fibonacci sequence.

Here are some example from our last walk

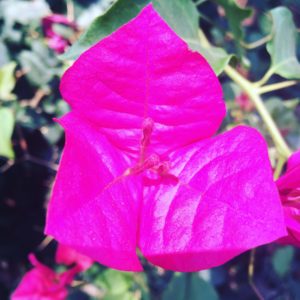
Bougainvillea
Bougainvillea

The Bougainvillea shows three bright pink leaves.

This California native has 5 petals.

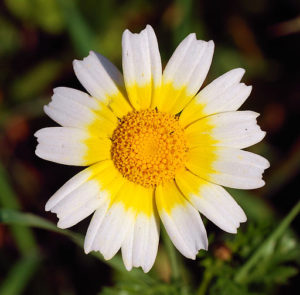
Daisy_January_2008-1

We had to count a lot of petals to find a perfect daisy.

We wrote in our journals and drew some of the flowers after the hike. A great way to introduce kids to the Fibonacci sequence.


How to Celebrate the International Day of Peace At Your School

img_8123

If we are to reach real peace in the world, we shall have to begin with the children.”

~ Mahatma Gandhi

The International Day of Peace is celebrated around the world on September 21. At noon children in every time zone will have a minute of silence. The wave of peace will be rung in in New York City with the Peace Bell. A bell made out of pennies that were donated from children around the world. The holiday is fairly new but a great way to focus on peace and community in our schools.

There are many wonderful songs about peace and our school is going to perform some at our morning assembly. We have battery operated candles for all the students and our first song is going to be Light A Candle for Peace.

We also picked A Song of Peace. This is one of our favorites and both songs are very easy to learn.

https://youtu.be/mxidrVmwznU
At noon the whole school will observe the minutes of silence that is part of the event. The plan is that a wave of peace will move around the world as each time zone hits noon.
This is our first time celebrating and we have come already across so many great ideas for next year.

Come an join us to celebrate the International Day of Peace around the world!


Teaching Your Students to Love Reading With a Reading Picnic

This post contains affiliate links to Amazon.com. Compensation received through this program helps to make this site possible. You can learn more about our disclosure policy right here.

img_8053

Do you want your students to LOVE reading?

I hate books!”

You have probably heard many students express their dislike for reading. We usually tell them that they don’t really mean it and how much fun reading can be. They read guided reading texts and stumble through our reading anthologies. They read decodable texts over and over in the hopes that the code will somehow stick to their developing brains.

The truth is that most teachers were prolific and fluent readers as children. It was a subject we thrived in and we loved getting lost in a book. Somehow the magic of a book touched us and we rode on the wings of our favorite tomes to far away adventures and magic realms. We would inhale the smell of a newly printed book as if the aroma was forshadowing the riveting adventures awaiting us.

We teachers have been working our tails off to get fluency rates up.  We test how many words they can read in a minute. We determine if they are able to read nonsense words. All these things are really important but they miss one really important point. Good readers LOVE reading. They enjoy doing it. The most important factor in the end is that we transmit this all important magic pixie dust: A LOVE for the printed word.

Benefits of Outdoor Learning

Do you remember you favorite reading spots from your childhood? Were any of them outside? Under a shady tree and a lawn? Reading outdoors is a very special treat that children rarely get to indulge in. Being outside benefits kids in so many ways.  Looking at and listening to nature increases dopamine levels in both children and adults. Not surprisingly happy people show better concentration and memorization skills.

Reading Picnic

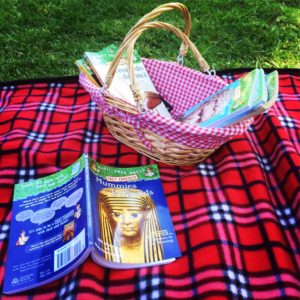
Have you ever tried a reading picnic center for your classroom? We absolutely love ours. We ordered a nice picnic blanket from Amazon.com and have our book centers in themed picnic baskets. The blanket works really well because it has plastic lining. You can wipe the plastic side and the blanket stays dry even if the ground is damp. It also seems to be extra soft and cushioned but any blanket you have at hand would work.

Magic Tree House Magic

One of our favorites reading picnics consists of a collection of Magic Tree House books. The whole collection is a treasure of exciting fiction combined with a great non-fiction background series.

Reading Recovery

The great thing about reading an entire series is that children become so familiar with the characters that it becomes manageable for even struggling readers. Once a student has mastered reading one book they feel confident and eager to read the rest. We have had success with this center even with 6th graders.

Great Activity for Volunteers

We are really blessed with lots of parent support and the reading picnic is a perfect center for volunteers. All the volunteer has to do is to grab the blanket and picnic basket and find a cozy spot under the trees.

The feedback we are getting from this center is amazing. Students love going outside and reading. They really get into the Magic Tree House series and some manage to read all of them!

If you don’t happen to live in California you can have your reading picnic indoors as well. Why not take the center to the hallway or cafeteria? Happy reading!

Littledigitalschoolhouse.com is a participant in the Amazon Services LLC Associates Program, an affiliate advertising program designed to provide a means for sites to earn advertising fees by advertising and linking to amazon.com. You can learn more about our disclosure policy right here.


Wandering Black Line Art Project

Wandering Black Line
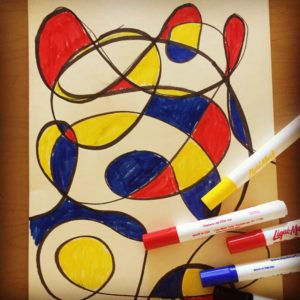
This is one of our favorite (Almost) No Prep Art Projects. You can literally pull this together in 5 minutes. We usually plan this for the first week of school and revisit versions of it throughout the year. The kids love it and every child can feel successful. We are always amazed how different each one turns out to be. The students’ personalities shine through in surprising ways.

First we turn on some music and hand out black markers. It really helps to monitor their meandering lines. We use water based markers and wipe the tables down afterwards. If you are using anything more permanent you might want to have some newspaper to cover the desks.

When the kids have finished the black lines we hand out red, yellow, and blue markers. We find it really helps to limit the colors in the beginning. Some of our other line projects include patterns and more shades. You can use any material at hand to make wandering lines. They even look great with only paper and pencil!

Are you interested in more (Almost) No Prep Art Projects? You can find a selection of our favorites right here.